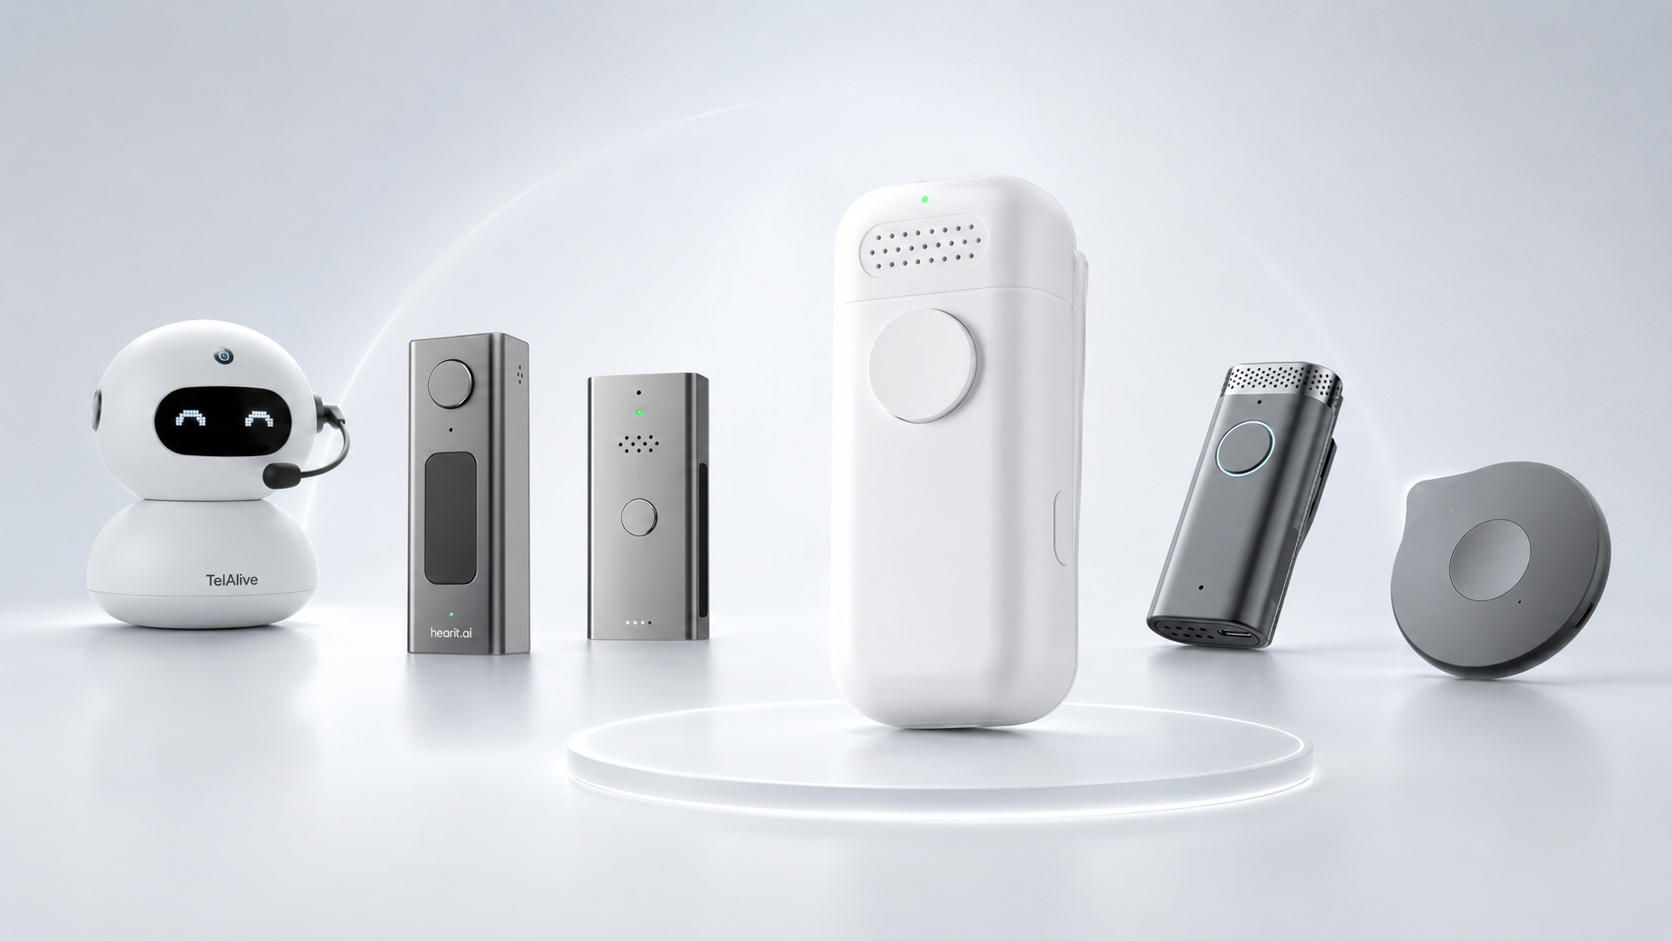
Enterprise AI software is becoming increasingly capable of transcribing conversations, separating speakers, generating summaries, identifying action items, and turning spoken information into structured business data.
However, the quality of these AI outputs still depends on one essential input: reliable audio.
Smartphones and laptops can support initial testing, but they are not always designed for consistent voice capture across customer meetings, conference rooms, field visits, and other real-world business environments.
This is why more AI software companies are exploring custom AI voice hardware built around their specific application, users, acoustic requirements, and data workflows.
In a recent project, an enterprise AI software company approached our team after testing a compact Bluetooth microphone with its mobile application. The prototype confirmed that dedicated hardware could improve the company’s voice workflow, but it also revealed several important limitations.
The testing process eventually led to a new product direction: a compact desktop voice device designed specifically for enterprise conversations.
This case study explains how the project moved from an off-the-shelf prototype to a clear custom hardware specification—and what other AI companies can learn from the process.
Why the Customer Started With an Existing Bluetooth Microphone
The company already had a mature software platform capable of processing conversations and identifying different speakers.
Rather than immediately developing a new device, the team began with a small Bluetooth microphone to validate the basic workflow.
The initial questions were practical:
- Could a dedicated microphone connect reliably to the company’s mobile application?
- Would it improve audio and transcription quality?
- Could users operate it naturally during real customer meetings?
- Would it provide enough value to justify custom hardware development?
- Which technical limitations would become visible during real-world testing?
This approach reduced early development risk.
Instead of defining a complete product based only on assumptions, the company could test an existing device, observe how users behaved, and use the results to create a more accurate product specification.
This is often the best starting point for custom AI hardware development.
An existing device does not need to represent the final product. Its purpose is to validate the workflow and expose the requirements that cannot be understood from a specification document alone.
The Prototype Validated the Workflow
The first tests produced encouraging results.
When the microphone was positioned close to the speaker, it improved the Bluetooth voice capture workflow and provided useful audio for the company’s downstream AI system.
The company could see clear potential in a dedicated device that connected directly to its application.
The prototype demonstrated several benefits:
- More consistent microphone positioning than a phone.
- A dedicated recording experience.
- Better integration potential with the company’s software.
- Reduced dependence on the phone’s built-in microphone.
- A clearer path toward a branded enterprise device.
However, the tests also showed that the prototype’s original form factor did not fully match the intended use case.
The device had been designed primarily for near-field recording. It performed well when worn close to one person, but audio quality decreased when it was placed farther away on a table.
For an enterprise meeting workflow, the device needed to capture multiple participants sitting at different positions.
The customer was not simply looking for a better wearable microphone. It needed a different acoustic product.
From Wearable Device to Desktop Voice Capture
The testing results led to a major product decision.
Rather than optimizing the existing wearable form factor, the company began defining a compact desktop device that could be carried between meetings and placed in the center of a table.
The new direction included several requirements:
- Compact enough for employees to carry easily.
- Large enough to support an effective microphone layout.
- Designed for table placement rather than clothing attachment.
- Able to capture conversations within a typical meeting area.
- Connected to the company’s mobile application through Bluetooth.
- Equipped with clear physical controls and status indicators.
- Optimized for the customer’s speaker-separation and AI-processing software.
This shift demonstrates an important lesson in custom AI voice hardware development:
The final form factor should be determined by the operating environment, not by the first prototype available for testing.
Wearable and desktop devices solve different acoustic problems.
A wearable microphone benefits from proximity to one speaker. The microphone remains close to the user’s mouth, which improves the signal-to-noise ratio and reduces the effect of room noise.
A desktop device must capture voices from multiple directions and greater distances. Its performance depends more heavily on microphone layout, acoustic structure, room reflections, background noise, signal processing, and placement.
Trying to turn a small wearable device into a far-field meeting device by replacing only the microphone would not have solved the underlying problem.
The complete audio architecture needed to be reconsidered.
Defining the Target Pickup Distance
One of the first technical requirements was the pickup range.
The customer wanted strong performance within the immediate meeting area, with the ability to capture participants located farther away under suitable room conditions.
This requirement affected nearly every part of the device design:
- Microphone selection.
- Microphone sensitivity.
- Microphone spacing.
- Acoustic openings.
- Enclosure dimensions.
- Internal component placement.
- Signal processing.
- Automatic gain control.
- Noise suppression.
- Bluetooth audio configuration.
- Downstream transcription performance.
Pickup distance cannot be solved by increasing microphone sensitivity alone.
A highly sensitive microphone may capture a distant voice, but it can also capture more air-conditioning noise, keyboard sounds, room reflections, and conversations from outside the intended area.
The objective is not simply to capture more sound. It is to capture audio that remains useful for speech recognition, speaker separation, and business analysis.
For this reason, the acoustic system must be evaluated end to end.
Two Microphones or Four Microphones?
The customer also asked whether the device should use two microphones or four.
This is a common question among AI software companies entering hardware development.
A larger microphone count may appear to guarantee better performance, but microphone count alone does not determine audio quality.
Advantages of a Two-Microphone Architecture
A two-microphone design can provide:
- Lower component cost.
- Lower power consumption.
- Simpler PCB and enclosure design.
- Lower processing requirements.
- Practical directional processing.
- Basic noise reduction.
- Easier product miniaturization.
For compact devices and controlled environments, two microphones may provide the best balance between cost, size, power, and performance.
Advantages of a Four-Microphone Architecture
A four-microphone array can provide:
- More spatial audio information.
- Greater flexibility for beamforming.
- Better directional estimation.
- More opportunities for noise suppression.
- Potentially stronger far-field performance.
- Additional data for downstream audio algorithms.
However, these benefits are only available when the entire system is designed correctly.
The microphones must have an appropriate geometry. Their positions must be compatible with the sound wavelengths and processing algorithms being used. The enclosure must not block, reflect, or distort the incoming sound.
The controller or DSP must also have enough processing capacity to handle the channels.
Adding microphones without redesigning the acoustic structure may increase cost and power consumption without creating a meaningful improvement.
The correct question is therefore not:
How many microphones should the device have?
It is:
Which microphone architecture produces the best end-to-end AI result in the customer’s target environment?
Raw Audio vs. Processed Audio
The customer already had its own speaker-separation technology.
This created another important design decision: should the hardware provide processed audio, raw audio, or both?
Digital signal processing can improve audio through functions such as:
- Noise suppression.
- Acoustic echo cancellation.
- Automatic gain control.
- Voice activity detection.
- Directional enhancement.
- Beamforming.
- Wind-noise reduction.
- Reverberation control.
Processed audio can be valuable for live transcription and real-time AI applications because it may provide a cleaner and more stable speech signal.
However, aggressive processing can also remove or change acoustic information used by downstream models.
A speaker-separation algorithm may benefit from natural differences in timing, direction, frequency, and room positioning. If multiple microphone inputs are mixed too early, some of that information may be lost.
For companies with proprietary audio AI, the best architecture may include multiple output options:
- A processed audio stream for real-time transcription.
- A lightly processed or raw stream for speaker separation.
- Independent microphone channels when bandwidth allows.
- Configurable DSP profiles for different use cases.
- An offline high-quality path for advanced analysis.
The correct approach must be validated using the customer’s actual models.
A microphone can sound clear to a human listener while producing weaker results for a particular AI system. Conversely, audio that sounds less polished may contain more useful information for speaker identification or separation.
For this reason, hardware testing should measure more than subjective audio quality.
It should also evaluate:
- Word error rate.
- Speaker-attribution accuracy.
- Missed speech.
- False speaker changes.
- Performance at different distances.
- Performance with overlapping speech.
- Performance under background noise.
- End-to-end processing latency.
Why Direct Companion-App Integration Matters
During the early evaluation, the microphone could operate as a standard Bluetooth audio device.
This made initial testing fast, but it did not provide the level of control required for a production enterprise workflow.
The customer preferred a direct integration between the hardware and its companion application.
A generic Bluetooth microphone primarily provides an audio input. The application may have limited visibility into the physical device’s status, battery, recording state, connection quality, or errors.
A direct application integration can give the software greater control over:
- Device discovery.
- User authentication.
- Bluetooth pairing.
- Recording commands.
- Session creation.
- Battery monitoring.
- Connection status.
- Firmware version.
- Error reporting.
- Audio transfer.
- Device configuration.
- Over-the-air updates.
It can also connect each recording to the correct business context.
For example, the app may already know:
- Which employee is using the device.
- Which customer meeting is taking place.
- Which account or project is involved.
- When recording consent was collected.
- Where the resulting transcript should be stored.
- Which AI workflow should process the recording.
The hardware should support this software context rather than operate as an isolated accessory.
This is one of the main differences between a generic microphone and purpose-built custom AI voice hardware.
What Happens When the App Closes?
One real-world test revealed another important issue.
A recording opportunity was missed when the mobile application was unintentionally closed.
This was not simply a user-training problem. It exposed a product reliability requirement.
In enterprise environments, systems must be designed for imperfect behavior:
- Applications may be closed.
- Bluetooth connections may drop.
- Mobile operating systems may restrict background activity.
- Permissions may change.
- Batteries may run low.
- Users may forget to confirm that recording has started.
- Audio transfers may be interrupted.
A production device should make these conditions visible and, where appropriate, recoverable.
Possible reliability measures include:
- Clear connection indicators.
- Clear recording indicators.
- In-app disconnection warnings.
- Automatic reconnection.
- Session recovery.
- Temporary local buffering.
- Encrypted backup storage.
- Audio-transfer retry logic.
- Audible or haptic alerts.
- Device and app health checks before meetings.
Not every feature needs to be included in the first product version. However, these failure modes should be identified during architecture planning.
Why the First Version May Not Need Local Storage
Local storage can provide a valuable safety net.
If the application closes or Bluetooth disconnects, the device may continue recording and upload the audio later.
However, storage also creates security and compliance responsibilities:
- Data encryption.
- User authentication.
- Access control.
- Retention limits.
- Secure deletion.
- Lost-device policies.
- Recovery authorization.
- Firmware security.
- Auditability.
For the first custom version, the customer considered a Bluetooth-first architecture without permanent local storage.
This allowed the team to focus on the core workflow:
- Capture audio through the custom device.
- Connect directly to the mobile application.
- Process the audio through the existing AI platform.
- Validate user adoption and recording quality.
- Introduce more advanced reliability features later.
This was not a rejection of local storage.
It was a sequencing decision.
A future product version could add secure local buffering after the application integration, acoustic architecture, and operational workflow had been validated.
Strong product development is not about including every possible feature in version one.
It is about identifying which features are required to prove the product and which features should be introduced after the core system is working.
Physical Buttons and Status Indicators
Although the product was designed around a mobile application, the customer still wanted clear controls on the device itself.
This is especially important for customer-facing conversations.
Users should not need to repeatedly check their phone to determine whether a device is connected or recording.
The developing control concept included:
- Power control.
- Bluetooth pairing control.
- Start-recording control.
- Pause or resume control.
- Finish-recording control.
- Power-status indicator.
- Bluetooth-status indicator.
- Recording-status indicator.
The exact interface would require further testing.
Too many controls can make the device confusing. Too few can make users uncertain.
The goal is to provide immediate answers to a few essential questions:
- Is the device on?
- Is it connected?
- Is it recording?
- Has recording been paused?
- Has the session ended?
- Does the user need to take action?
The mobile application can provide detailed information, while the physical device provides immediate confirmation.
Together, they create a more reliable workflow.
Designing the Enclosure After the Acoustic Architecture
The customer had access to external product-design resources and was interested in developing a professional enclosure.
However, the enclosure could not be finalized before the internal system requirements were understood.
Industrial design and acoustic engineering must be coordinated.
A visually attractive enclosure can still damage audio performance if it:
- Blocks microphone openings.
- Places microphones too close together.
- Creates internal reflections.
- Introduces vibration.
- Positions microphones near noisy electronic components.
- Restricts antenna performance.
- Limits battery capacity.
- Prevents effective heat management.
- Leaves insufficient space for buttons or indicators.
The recommended sequence was:
- Define the use case.
- Establish the pickup requirements.
- Select the microphone architecture.
- Validate the electronics and DSP approach.
- Define the required internal volume.
- Determine microphone and antenna placement.
- Freeze the physical requirements.
- Develop the final enclosure.
This process prevents a common and expensive mistake: designing a beautiful enclosure first and discovering later that it limits acoustic performance.
Turning Product Requirements Into a Cost Model
Once the general architecture was defined, the discussion moved toward development and production costs.
A responsible estimate for custom AI hardware should separate one-time development costs from recurring unit costs.
One-Time Development Costs
These may include:
- System architecture.
- Schematic and PCB design.
- Firmware development.
- Companion-app integration.
- Bluetooth protocol development.
- Acoustic engineering.
- DSP tuning.
- Prototype manufacturing.
- Mechanical engineering.
- Tooling.
- Product testing.
- Reliability validation.
- Regulatory certification.
Recurring Unit Costs
These may include:
- Microphones.
- Main processor.
- Audio codec or DSP.
- Bluetooth components.
- Battery.
- Power-management components.
- PCB and assembly.
- Buttons and indicators.
- Enclosure.
- Charging components.
- Packaging.
- Quality control.
The unit price must then be modeled at different production volumes.
This enables the customer to evaluate tradeoffs such as:
- Two microphones versus four.
- Permanent storage versus no storage.
- Larger battery versus smaller enclosure.
- Basic Bluetooth versus a more advanced data protocol.
- Standard enclosure versus custom tooling.
- Simple LEDs versus a display.
- Consumer-grade versus enterprise-grade components.
Instead of presenting one misleading unit price before the product is defined, the development team can show how each decision affects cost.
A Recommended Custom AI Voice Hardware Development Process
Based on the project, the most effective path included six stages.
Stage 1: Workflow Validation
Use an existing device to test the basic user experience, application workflow, audio path, and downstream AI results.
The goal is to identify the real requirements before committing to custom development.
Stage 2: Requirements Definition
Document:
- Target environment.
- Room size.
- Speaker count.
- Pickup distance.
- Device placement.
- Mobile platform.
- Recording duration.
- Battery requirement.
- Audio format.
- Processing requirement.
- Security requirement.
- Target production scale.
Stage 3: Architecture Evaluation
Compare:
- Two-microphone and four-microphone configurations.
- Raw and processed audio.
- Different microphone layouts.
- Bluetooth profiles.
- Companion-app integration methods.
- Local buffering options.
- Processor and DSP choices.
Stage 4: Functional Prototyping
Build prototypes to measure:
- Audio quality.
- Transcription accuracy.
- Speaker separation.
- Bluetooth stability.
- Application behavior.
- Battery consumption.
- Recording-state visibility.
- Recovery from interruptions.
Stage 5: Product Design and Pilot
After the internal architecture has been validated:
- Finalize the enclosure.
- Develop tooling.
- Complete firmware.
- Prepare certification.
- Produce pilot units.
- Run controlled customer testing.
Stage 6: Production Readiness
Before mass production:
- Validate manufacturing processes.
- Define quality-control procedures.
- Complete reliability testing.
- Establish firmware-update processes.
- Confirm packaging and logistics.
- Prepare support and replacement workflows.
What This Case Study Teaches AI Software Companies
The project produced several lessons that apply to other AI companies considering dedicated hardware.
1. Start With the Workflow, Not the Device
The objective is not to manufacture a microphone.
The objective is to improve a complete AI workflow involving users, hardware, software, audio data, and business outcomes.
2. Use Existing Hardware to Discover Requirements
An early prototype can reveal connection problems, acoustic limitations, user confusion, and missing reliability features before custom development begins.
3. Do Not Evaluate Audio Quality in Isolation
Measure how the audio performs in transcription, speaker separation, summarization, and other downstream AI tasks.
4. Microphone Count Is Only One Part of the System
Microphone quality, positioning, enclosure design, processing, connectivity, and downstream models must be evaluated together.
5. Direct Software Integration Creates More Value
A generic Bluetooth microphone may capture audio, but direct application integration enables device control, identity, session context, error handling, and firmware management.
6. Design for Failure Conditions
Enterprise recording workflows must account for application closures, connection loss, background restrictions, low battery, and interrupted transfers.
7. Freeze the Enclosure Last
The physical design should support the verified acoustic and electronic architecture, not restrict it.
Conclusion: Building Hardware Around the AI
Custom AI voice hardware is not simply a microphone placed inside a branded enclosure.
It is a coordinated system involving:
- Acoustic engineering.
- Microphone architecture.
- Electronics.
- Firmware.
- Bluetooth connectivity.
- Companion-app integration.
- Audio processing.
- User controls.
- Data security.
- Manufacturing.
- Downstream AI performance.
In this project, an existing wearable microphone successfully validated the customer’s Bluetooth workflow. At the same time, it revealed that the final product needed to become something different: a compact desktop device designed for multi-speaker enterprise conversations.
That transition—from testing an available device to defining a purpose-built product—is exactly why prototype evaluation matters.
For AI software companies entering the physical world, the most effective process is:
- Validate the workflow.
- Identify real-world failure points.
- Define the acoustic and software requirements.
- Test the end-to-end AI results.
- Build the custom hardware around the verified use case.
The result is not just better audio.
It is a more reliable source of voice data for the entire AI system.
Frequently Asked Questions
What is custom AI voice hardware?
Custom AI voice hardware is a purpose-built physical device designed to capture, process, or transmit voice data for a specific AI application. It may include microphones, processors, connectivity, firmware, physical controls, and direct integration with an AI software platform.
Why not use a smartphone microphone?
Smartphones are useful for early testing, but their placement, operating-system behavior, background restrictions, microphone direction, and user handling may create inconsistent audio. A dedicated device can provide a more controlled and reliable capture experience.
How many microphones does an AI voice device need?
The correct number depends on the form factor, pickup distance, room conditions, processing architecture, power requirements, and downstream AI models. A well-designed two-microphone system may outperform a poorly designed four-microphone system.
Does custom AI voice hardware need DSP?
Not always. DSP can improve noise reduction, echo cancellation, gain control, and far-field capture. However, some AI models may benefit from raw or lightly processed audio. The decision should be based on end-to-end testing.
Should an enterprise voice device include local storage?
Local storage can protect against Bluetooth or application failures, but it introduces encryption, access-control, retention, and compliance requirements. Some first-generation devices may use a Bluetooth-first approach before adding secure local backup.
Can custom voice hardware integrate directly with an AI application?
Yes. A custom Bluetooth protocol, SDK, API, or firmware integration can allow an application to control recording, monitor device status, manage sessions, transfer audio, update firmware, and connect recordings to the correct user or business context.
Build Custom AI Voice Hardware for Your Software Platform
If your AI product depends on high-quality voice data, dedicated hardware can improve how conversations are captured, connected, and processed.
GMIC works with AI software companies on:
- Custom microphone devices.
- AI meeting hardware.
- Voice-capture wearables.
- Bluetooth and companion-app integration.
- Firmware and SDK development.
- Audio DSP and acoustic tuning.
- PCB and electronics development.
- Prototyping and testing.
- Certification and mass-production support.
The best first step is not selecting a microphone or designing an enclosure.
It is defining the complete voice workflow the hardware needs to support.